
Introduce your cat to the flap prior to installation to allow them to become familiar with its dimensions and shape. Prop the flap open and let them explore it from all angles.
Make sure Repair My Windows And Doors UK cut-out is level and ensure that the cut-out is square and even. Mark the screw holes and align them with your cat flap opening. The distance between the edges must be the same.
Preparation
Installing a cat flap in your home can be beneficial for the health and wellbeing of your pet. This is because it allows the pet to move freely between the indoors and outdoors without needing to let them in or out. It can also stop them fighting over the cat food and litter box, or even the door to the house itself.
The first thing that you will need to do prior to beginning your cat flap install is make sure that you have the area ready for where it will be located. It will be much easier to work if you remove any obstacles. It is also important to take away any furniture or decorations that might hinder the installation.
You will have to mark and measure the space where you intend to install the cat flap. This will allow you avoid making an error that could damage your door or wall. You will want to put the cat flap in a spot that is accessible to your pets, but doesn't affect the structural integrity of your home.
The cat flap can be put on the doorway leading to a space that is closed such as your closet or laundry room. This will stop the cat from being able to jump over it, and allow you to keep the cats safe from any possible dangers. The flap should be low enough for your cat's smallest to use, since larger cats may have difficulty to jump through the flap.
It might be a wise idea to hire an expert handyman if you own sliding doors or sash window that is old-fashioned. Installing a cat flap on these doors and windows can be challenging and mistakes can lead to expensive damage. A professional can install the cat flap safely and without damaging the structural strength of the window or door.
You'll need to determine the height of your cat's belly from the ground to determine the flap's location. This will allow you to accurately cut the flap's opening. Use a spirit level after having marked the line to ensure it's horizontal. Follow the directions that came along with your cat flap kit for the template drawing. Attach the template to your door, so that the bottom edge is in line with the horizontal lines that you've drawn. The template should be centered at the middle of the door.
Measurement
A cat flap, also known as a pet door is a small opening in the bottom of your exterior doors or windows that allows a pet to leave and enter the home. They are available in a variety of sizes and materials, so you can choose the best one for your house and pets.
Before you purchase an animal flap, you need to measure precisely the size of your windows or doors in which you plan to install it. You can then be sure that your cat flap will fit and the hole will be the right size. You can use this technique to measure the width of the opening by securing off a section and walking through it with your pet.
It is also advisable to measure the height of your cat from the floor to the lowest point on their belly. This will ensure that the flap is installed at a level that your cats are comfortable with. If it's too low, they may struggle to get through. If it is too high, they may not be in a position to use the flap.
In general, you should strive to make your holes at an angle of 45 degrees to the vertical surface. This will ensure the most secure and stable installation of your cat flap. The best option is to utilize a spirit level to assist you with this but if the instructions that came with your cat flap kit don't include this feature, straight edges will work equally well.
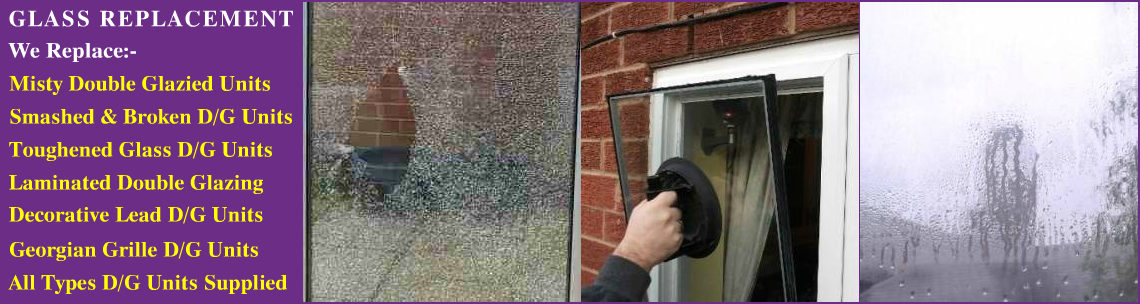
It is recommended to have an experienced glazier install the cat flap in a UPVC or glass window or door. This is because these types of doors are usually made of toughened glass and drilling into them could compromise the strength of the glass and may lead to it shattering in the future, which could pose a security risk for your home.
It can be a challenge to install a cat flap in brick walls, since drilling into a soft area of the wall can cause problems for cables and pipes running through the property. This can result in costly repairs and leaks, as well as weather damage from outside.
Marking
After you've measured your cat or kitten to find the right size flap It's time to mark where the hole needs to go. Mark the centre of the flap using your spirit level. If the template for your cat flap kit doesn't include an outline of the centre line, you can photocopy it and trace around it using a pencil to mark the area where the hole will need to be cut.
Remember, if the cat flap is too low, it will be difficult for your cat to climb in and out of your house, and if the flap is too high, they might struggle to see what's happening outside. To ensure your cat feels secure and safe, it is best to place the flap as close as you can to their belly.
It is also important to be aware not to put a cat flap in too close to the frame of a solid wall as it could cause problems with damp, draughts and stability. If you're not familiar with masonry work it may be worthwhile to seek out professional assistance.
Then then, open the door and encourage your cat or kitten to go through it by pointing out where they should go (it helps if someone's on the inside to help them). Once they've made their way through the door, you can slowly start to allow them to enter and exit at will.
You should not push your kitten or cat through the flap too quickly as this could cause them to be scared. The clunk and snap squeak of the door closing can cause harm to your cat or kitten. They will be even more scared if their tail is caught in the flap. Cats also have a habit of returning home to look for intruders so having the door open at this time could be a problem since it could lead to your pet being attacked by a cat they know. This is why it's recommended to install an uninspiring cat flap and only if your cat or kitten is aware of using it.
Installation
It is essential to show your cat how to use the cat flap once it's been installed. It will take a while, but with patience, and a few treats to provide encouragement your cat will eventually learn how to utilize it. It is also possible to install a lock on the flap for extra security, especially in harsh weather conditions or when you're out of the house.
The first thing you need to do is decide where you want to place the cat flap on your door. It should be located in a place that can open up to an area that is sheltered from the garden. This will allow your cat to feel more secure as they come into and out of the house, and can help prevent other animals from accessing your home.
Another factor to consider is the height you'd like to set the flap for your cat at. This should be in the same space as the measurement of your cat's belly to ensure that they can get through the door easily. You can also put steps on either side of the entrance to help your cat to get through.
Once you have chosen the location you would like to put the cat flap, measure the door and mark it with the pencil. This will help you determine the location you will need to cut. Then, you'll need to cut out an area on the door using a Jigsaw. It is advised to wear safety goggles and a dust mask when doing this, since inhaling dust could be harmful to your health. After the square is cut, it is necessary to sand the edges of the door to smooth the edges.
After you've completed sanding, you can now replace the cat flap on your door. It is recommended to put the cat flap in such that the lock (if there is one) is positioned on the inside of the door. If there are screws for the cat flap on the door, now drill these into place. Then you can carefully place the flap into the hole. Make sure it fits snugly.